Russian peach cake might just be the most underrated bake you’ve never heard of, and once you make it, you’ll wonder how it stayed off your radar for so long. Soft, pillowy cookie shells filled with a creamy peach filling, shaped to look like real peaches, and rolled in orange-tinted sugar. They’re adorable, delicious, and somehow one of the most satisfying things I’ve ever made in a kitchen.
What Is Russian Peach Cake?
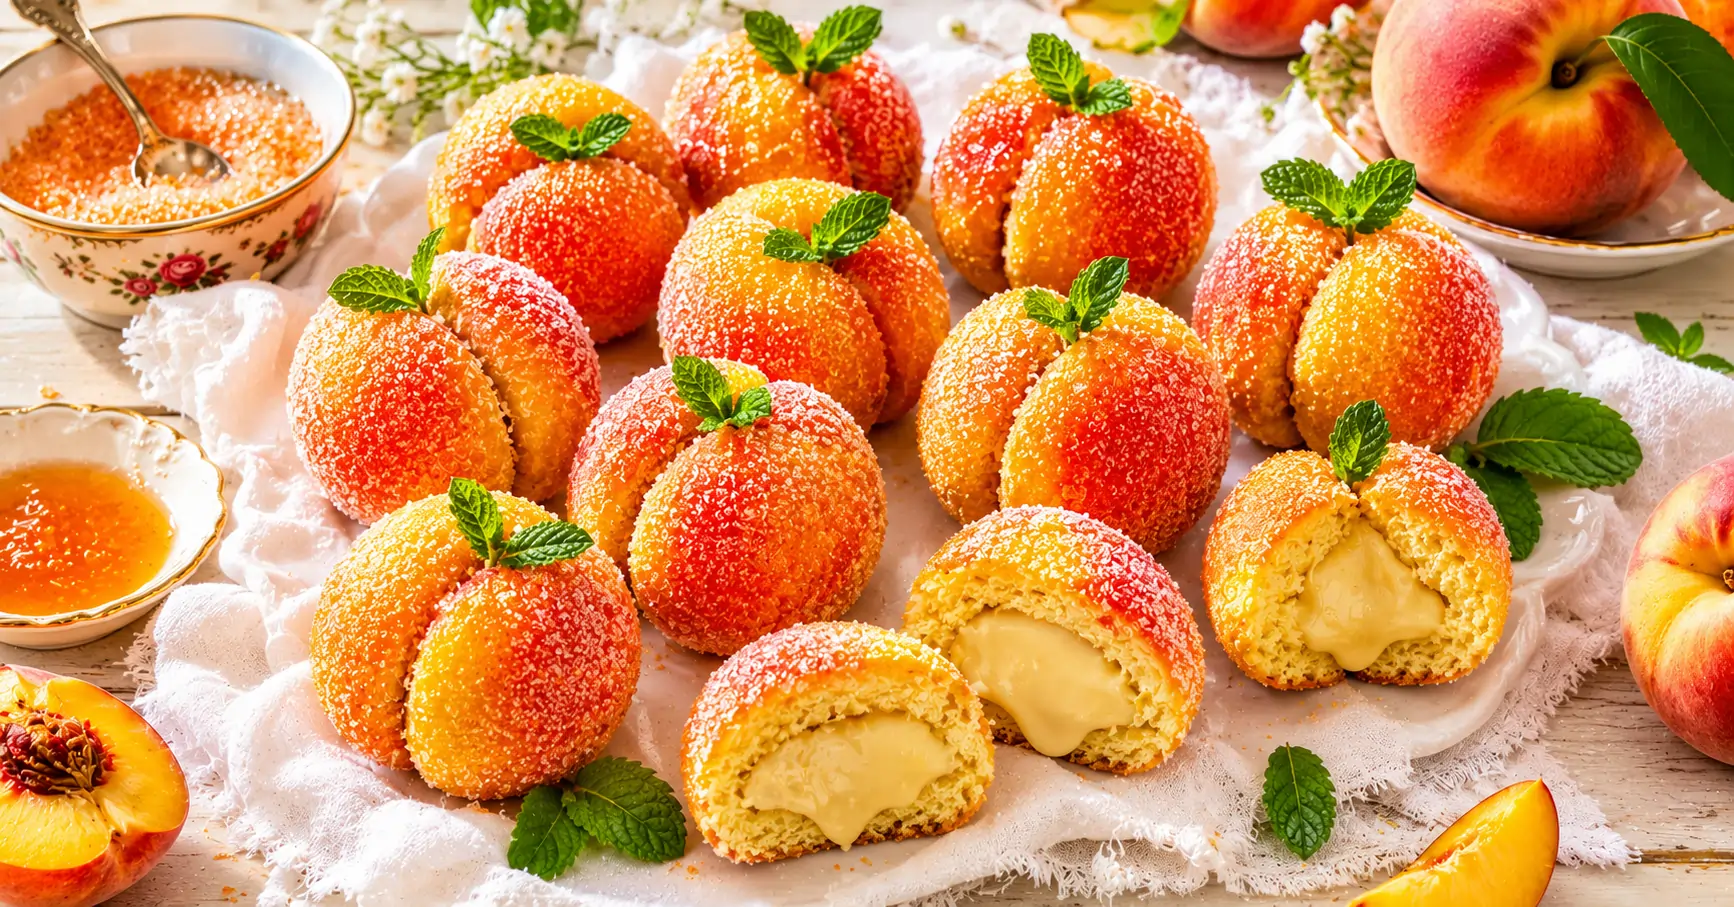
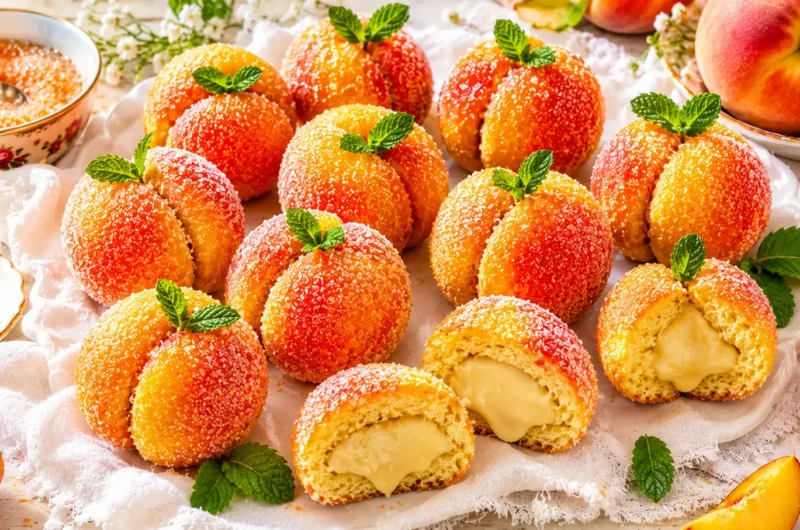
Russian peach cake (Persiki) is a classic Eastern European treat made from two dome-shaped shortbread-style cookies sandwiched together with a sweet cream and condensed milk filling, then soaked briefly in peach juice and rolled in orange-coloured sugar to mimic the look of a real peach. A small piece of green angelica or mint leaf completes the illusion. The result is genuinely charming little peach-shaped treats that taste as good as they look.
They’re a staple at Russian and Ukrainian celebrations, birthday tables, and holiday gatherings. IMO, it’s criminal they haven’t gone more mainstream globally, they deserve to be everywhere.
Ingredients You’ll Need
For the Cookie Shells
- 3 large eggs
- 150g (¾ cup) caster sugar
- 150g (⅔ cup) unsalted butter, softened
- 4 tbsp sour cream
- 1 tsp pure vanilla extract
- ½ tsp baking soda
- 1 tsp white vinegar to activate the baking soda
- 400–450g (3–3½ cups) all-purpose flour, plus extra for dusting
For the Filling
- 200g (7oz) softened unsalted butter
- 150g (5oz) sweetened condensed milk
- 3 tbsp sour cream
- 1 tsp vanilla extract
- Cookie crumbs from the hollowed centres (see below)
For Finishing
- 200ml (¾ cup) peach juice or syrup from tinned peaches works perfectly
- Orange and yellow food colouring
- 200g (1 cup) granulated sugar, divided and tinted
- Small fresh mint leaves or green angelica for the “stem”
FYI, tinned peach syrup is your best friend here. It’s perfectly sweet, consistently flavoured, and free. Just drain a tin of peaches into a bowl, and you’ve got exactly what you need for soaking. No need to buy separate peach juice.
How to Make Easy Russian Peach Cake
Step 1: Make the Cookie Dough
Beat the softened butter and caster sugar together until light and fluffy. Add the eggs one at a time, beating well after each addition, then mix in the sour cream and vanilla extract. Mix the baking soda and white vinegar in a small bowl. It’ll fizz immediately, and add it straight away to the batter. Stir to combine.
Add the flour gradually, mixing until a soft, slightly sticky dough forms. Don’t overwork it; mix just until it comes together. Wrap the dough in clingfilm and refrigerate for 30 minutes to firm up slightly. Chilled dough is much easier to shape and holds its dome shape better during baking.
Step 2: Shape and Bake
Preheat your oven to 180°C / 160°C fan / 350°F. Roll the dough into balls about the size of a large walnut, roughly 25–30g each. Place them on lined baking trays and press each ball gently into a dome shape, flattened on the bottom, rounded on top, about 4–5cm wide. You want pairs of matching sizes so they sandwich together evenly.
Bake for 12–15 minutes until the bases are lightly golden, but the tops stay pale. The pale top is intentional; it becomes the outside of the peach and needs to absorb the colouring later. Don’t let them brown on top.
Leave to cool completely on a wire rack.
Step 3: Hollow and Fill
Once completely cool, use a small teaspoon or melon baller to scoop a shallow hollow from the flat bottom of each cookie about 1cm deep. Save every crumb; these go straight into the filling.
Beat the softened butter until pale and fluffy. Add the condensed milk, sour cream, and vanilla extract and beat until smooth and creamy. Fold in the cookie crumbs; they add texture and a subtle biscuity flavour to the filling that makes it genuinely special. The filling should be thick enough to hold its shape when scooped.
Fill one cookie half generously, then press a matching cookie on top to sandwich them together. The filling should just peek out at the seam. Repeat until all the cookies are paired and filled.
Step 4: Soak in Peach Juice
Pour the peach juice or syrup into a shallow bowl. Briefly dip each assembled peach in the juice just 2–3 seconds per side. You want the outside of the cookie slightly moistened so it absorbs the sugar colouring, but not so wet that it falls apart. Think of it as a quick bath, not a long soak.
Place the dipped peaches on a wire rack to drain for a couple of minutes.
Step 5: Colour and Finish
Divide the granulated sugar between two bowls. Tint one bowl bright orange and the other a lighter yellow using food colouring. Mix well until the colour distributes evenly through the sugar. For that authentic peachy look, roll each dipped peach in the yellow sugar first, then dab a little orange sugar on one side using your fingertips to mimic the natural blush of a real peach.
Press a small fresh mint leaf or piece of green angelica into the top of each peach as the “leaf.” Stand back and admire your work; they look almost too good to eat.
Tips for Perfect Russian Peach Cakes
- Match your cookie pairs before baking. Roll your dough balls to consistent sizes and pair them on the tray. Baking changes the size slightly, so matching them fresh makes sandwiching much easier later.
- Don’t skip the chill time. Warm dough spreads too much in the oven, and you lose the dome shape. The 30-minute chill is quick but genuinely makes a difference.
- Work quickly with the peach juice. A brief dip is all you need; over-soaked cookies become fragile and may crack when rolled in sugar.
- Use gel food colouring for the sugar; it blends more evenly than liquid colouring and gives you more vibrant, consistent results without making the sugar clump.
- Storage: Keep in an airtight container in the fridge for up to 4 days. They actually taste better after a day, as the filling softens the cookie slightly and everything melds together beautifully.
Frequently Asked Questions
Can I use fresh peach juice instead of tinned? Yes, blend a ripe fresh peach and strain the juice through a fine sieve. It works beautifully and gives a slightly more intense fresh flavour. Just make sure it’s not too pulpy, or the coating won’t stick cleanly.
Why are my peach cakes falling apart during soaking? Usually means the cookie was soaked too long or the dough was underbaked. The cookies need to be fully baked through, firm to the touch, before soaking. A quick 2-second dip per side is genuinely all they need.
Can I make these ahead of time for a party? Absolutely, these are actually better made the day before. The filling softens the shell slightly overnight, and the flavours develop beautifully. Assemble, colour, and refrigerate up to 24 hours in advance.
Final Thoughts
Easy Russian peach cake is one of those recipes that feels like discovering a secret the rest of the world hasn’t caught onto yet. They take a bit of time and a few steps, but none of those steps is difficult, and the payoff is genuinely extraordinary. Little peach-shaped treats that taste as incredible as they look.
Make a batch for your next celebration and watch people’s faces when they realise they’re not actually peaches. That moment never gets old.
Easy Russian Peach Cake Recipe
Course: Desserts4
servings30
minutes40
minutes300
kcalIngredients
For the Cookie Shells
3 large eggs
150g (¾ cup) caster sugar
150g (⅔ cup) unsalted butter, softened
4 tbsp sour cream
1 tsp pure vanilla extract
½ tsp baking soda
1 tsp white vinegar to activate the baking soda
400–450g (3–3½ cups) all-purpose flour, plus extra for dusting
For the Filling
200g (7oz) softened unsalted butter
150g (5oz) sweetened condensed milk
3 tbsp sour cream
1 tsp vanilla extract
Cookie crumbs from the hollowed centres (see below)
For Finishing
200ml (¾ cup) peach juice or syrup from tinned peaches works perfectly
Orange and yellow food colouring
200g (1 cup) granulated sugar, divided and tinted
Small fresh mint leaves or green angelica for the “stem”
Directions
- Make the Cookie Dough
Beat the softened butter and caster sugar together until light and fluffy. Add the eggs one at a time, beating well after each addition, then mix in the sour cream and vanilla extract. Mix the baking soda and white vinegar in a small bowl. It’ll fizz immediately, and add it straight away to the batter. Stir to combine.
Add the flour gradually, mixing until a soft, slightly sticky dough forms. Don’t overwork it; mix just until it comes together. Wrap the dough in clingfilm and refrigerate for 30 minutes to firm up slightly. Chilled dough is much easier to shape and holds its dome shape better during baking. - Shape and Bake
Preheat your oven to 180°C / 160°C fan / 350°F. Roll the dough into balls about the size of a large walnut, roughly 25–30g each. Place them on lined baking trays and press each ball gently into a dome shape, flattened on the bottom, rounded on top, about 4–5cm wide. You want pairs of matching sizes so they sandwich together evenly.
Bake for 12–15 minutes until the bases are lightly golden, but the tops stay pale. The pale top is intentional; it becomes the outside of the peach and needs to absorb the colouring later. Don’t let them brown on top.
Leave to cool completely on a wire rack. - Hollow and Fill
Once completely cool, use a small teaspoon or melon baller to scoop a shallow hollow from the flat bottom of each cookie about 1cm deep. Save every crumb; these go straight into the filling.
Beat the softened butter until pale and fluffy. Add the condensed milk, sour cream, and vanilla extract and beat until smooth and creamy. Fold in the cookie crumbs; they add texture and a subtle biscuity flavour to the filling that makes it genuinely special. The filling should be thick enough to hold its shape when scooped.
Fill one cookie half generously, then press a matching cookie on top to sandwich them together. The filling should just peek out at the seam. Repeat until all the cookies are paired and filled. - Soak in Peach Juice
Pour the peach juice or syrup into a shallow bowl. Briefly dip each assembled peach in the juice just 2–3 seconds per side. You want the outside of the cookie slightly moistened so it absorbs the sugar colouring, but not so wet that it falls apart. Think of it as a quick bath, not a long soak.
Place the dipped peaches on a wire rack to drain for a couple of minutes. - Colour and Finish
Divide the granulated sugar between two bowls. Tint one bowl bright orange and the other a lighter yellow using food colouring. Mix well until the colour distributes evenly through the sugar. For that authentic peachy look, roll each dipped peach in the yellow sugar first, then dab a little orange sugar on one side using your fingertips to mimic the natural blush of a real peach.
Press a small fresh mint leaf or piece of green angelica into the top of each peach as the “leaf.” Stand back and admire your work; they look almost too good to eat.