No oven, no fuss, and no special equipment, these peanut butter cheesecake balls come together in about 30 minutes and disappear even faster. I brought a batch to a family get-together once, put them out without saying anything, and they were gone before I made it back from the kitchen. That told me everything I needed to know.
What Are Peanut Butter Cheesecake Balls?
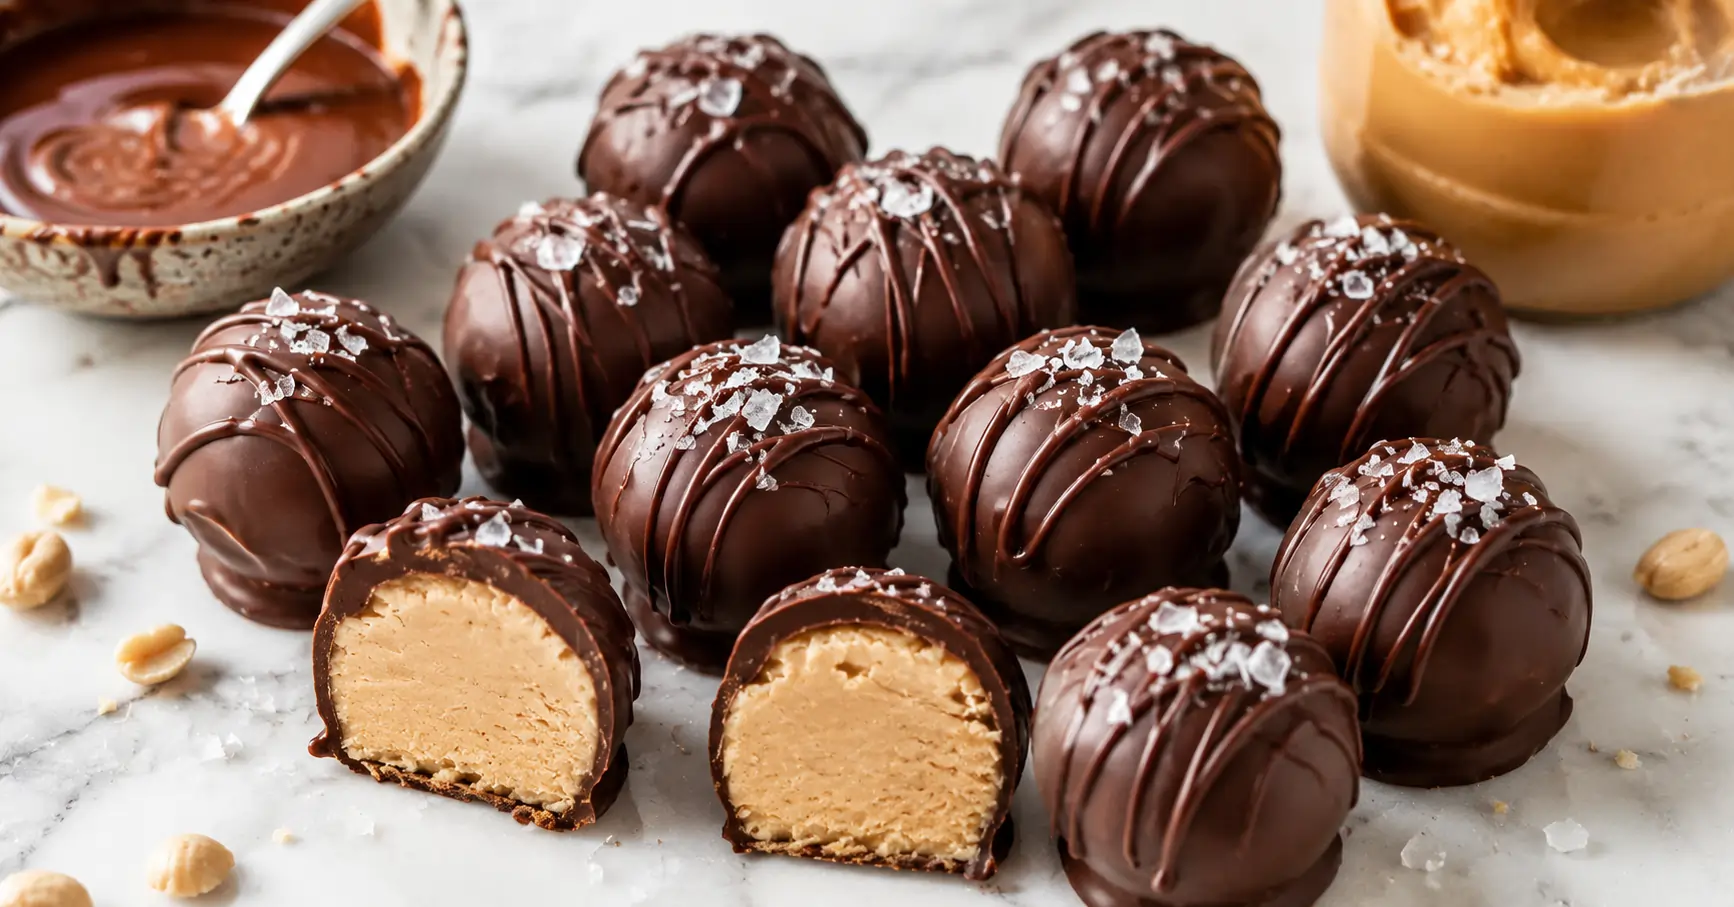
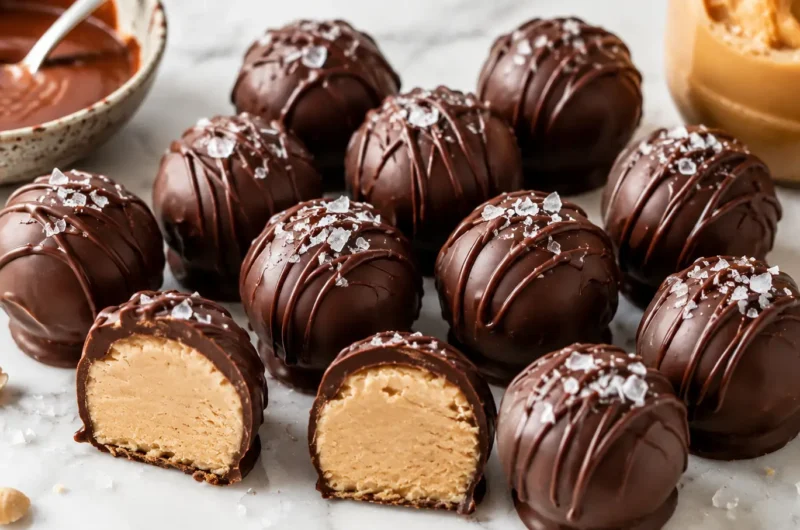
Peanut butter cheesecake balls are no-bake bite-sized treats made from a creamy mixture of cream cheese, peanut butter, and powdered sugar rolled into balls and coated in chocolate. They taste exactly like a peanut butter cheesecake, just in a more portable, snackable form.
Think Reese’s Peanut Butter Cups, but creamier and homemade. Yeah. Exactly.
Ingredients
Simple pantry staples. Nothing you’d need to hunt down.
- 225g (8oz) full-fat cream cheese, softened to room temperature
- ½ cup creamy peanut butter (not the natural runny kind, more on this below)
- 1½ cups powdered sugar, sifted
- 1 teaspoon vanilla extract
- Pinch of salt
- 300g (10oz) dark or milk chocolate, for coating
- 1 tablespoon coconut oil (makes the chocolate coating smoother)
FYI, use a standard commercial peanut butter like Jif or Skippy here, not natural peanut butter. Natural PB separates and makes the mixture too wet to roll into clean balls.
Step-by-Step Method
Step 1: Make the Cheesecake Filling
Beat the softened cream cheese and peanut butter together in a large bowl until completely smooth. Add the powdered sugar, vanilla extract, and a pinch of salt, then mix until everything comes together into a thick, uniform dough.
Taste it at this point. I’m not saying eat half the bowl, but also I’m not saying don’t.
Step 2: Chill the Mixture
Cover the bowl and refrigerate the mixture for at least 1 hour. This firms it up enough to roll without it sticking to your hands and turning into a mess.
Skipping the chill step is tempting. Don’t. A Warm cream cheese mixture is almost impossible to roll neatly.
Step 3: Roll Into Balls
Scoop out about one tablespoon of the mixture per ball and roll between your palms quickly. Place each ball on a parchment-lined baking tray.
Once you’ve rolled them all, pop the tray back in the freezer for 20 minutes. Cold balls hold their shape much better when you dip them in chocolate.
Step 4: Melt the Chocolate
Melt the chocolate and coconut oil together either in a microwave in 30-second bursts, stirring between each, or in a heatproof bowl over a pot of barely simmering water.
Stir until completely smooth and glossy. Let it cool for a couple of minutes before dipping or the-hot chocolate melts the filling.
Step 5: Coat in Chocolate
Use a fork or dipping tool to lower each ball into the melted chocolate. Lift it out, let the excess drip off, and place it back on the parchment tray.
Work quickly and keep the remaining balls in the freezer while you coat they soften fast at room temperature.
Step 6: Set and Serve
Let the chocolate set at room temperature for 15 minutes, or speed things up by putting the tray in the fridge for 10 minutes. Once the coating is firm, they’re ready.
Tips for Perfect Results Every Time
- Softened cream cheese is non-negotiable. Cold cream cheese leaves lumps and doesn’t mix smoothly with the peanut butter.
- Sift the powdered sugar. Unsifted sugar leaves grainy pockets in the filling.
- Don’t skip the freezer step before dipping. Firm balls = cleaner chocolate coating.
- Add a sprinkle of sea salt flakes on top before the chocolate sets. IMO, this is the move that elevates the whole thing from “good snack” to “what is this and where can I get more.”
Variations Worth Trying
Not everyone wants the same thing, and honestly, that’s fine. Here are a few easy swaps:
- White chocolate coating is sweeter and visually striking against the pale filling
- Crushed graham crackers mixed into the filling adds texture and leans more into the cheesecake vibe
- Almond butter instead of peanut butter works beautifully if you’re serving someone with a peanut allergy
- A Drizzle of melted white chocolate over the dark coating makes them look genuinely impressive with almost no extra effort
Common Questions
How long do these keep? Store them in an airtight container in the fridge for up to one week, or freeze them for up to two months. They thaw quickly at room temperature, about 10 minutes.
Can I make these ahead of time? Absolutely. These are one of the best make-ahead treats out there. Make the filling and roll the balls up to two days ahead, then dip in chocolate the day you need them.
Why is my mixture too soft to roll? Either the cream cheese wasn’t cold enough after mixing, or the peanut butter was too runny. Chill the mixture longer; sometimes it needs 2 hours rather than 1.
Final Thoughts
These creamy no-bake peanut butter cheesecake balls check every box: easy, quick, crowd-pleasing, and genuinely delicious. You don’t need baking skills, you don’t need fancy equipment, and you don’t need much time.
Make a double batch the first time. Trust me, a single batch never survives long enough to find out if they freeze well.
Creamy No-Bake Peanut Butter Cheesecake Balls Recipe
Course: Desserts4
servings30
minutes40
minutes300
kcalIngredients
225g (8oz) full-fat cream cheese, softened to room temperature
½ cup creamy peanut butter (not the natural runny kind, more on this below)
1½ cups powdered sugar, sifted
1 teaspoon vanilla extract
Pinch of salt
300g (10oz) dark or milk chocolate, for coating
1 tablespoon coconut oil (makes the chocolate coating smoother)
Directions
- Make the Cheesecake Filling
Beat the softened cream cheese and peanut butter together in a large bowl until completely smooth. Add the powdered sugar, vanilla extract, and a pinch of salt, then mix until everything comes together into a thick, uniform dough.
Taste it at this point. I’m not saying eat half the bowl, but also I’m not saying don’t. - Chill the Mixture
Cover the bowl and refrigerate the mixture for at least 1 hour. This firms it up enough to roll without it sticking to your hands and turning into a mess.
Skipping the chill step is tempting. Don’t. A Warm cream cheese mixture is almost impossible to roll neatly. - Roll Into Balls
Scoop out about one tablespoon of the mixture per ball and roll between your palms quickly. Place each ball on a parchment-lined baking tray.
Once you’ve rolled them all, pop the tray back in the freezer for 20 minutes. Cold balls hold their shape much better when you dip them in chocolate - Melt the Chocolate
Melt the chocolate and coconut oil together either in a microwave in 30-second bursts, stirring between each, or in a heatproof bowl over a pot of barely simmering water.
Stir until completely smooth and glossy. Let it cool for a couple of minutes before dipping or the-hot chocolate melts the filling. - Coat in Chocolate
Use a fork or dipping tool to lower each ball into the melted chocolate. Lift it out, let the excess drip off, and place it back on the parchment tray.
Work quickly and keep the remaining balls in the freezer while you coat they soften fast at room temperature. - Set and Serve
Let the chocolate set at room temperature for 15 minutes, or speed things up by putting the tray in the fridge for 10 minutes. Once the coating is firm, they’re ready.