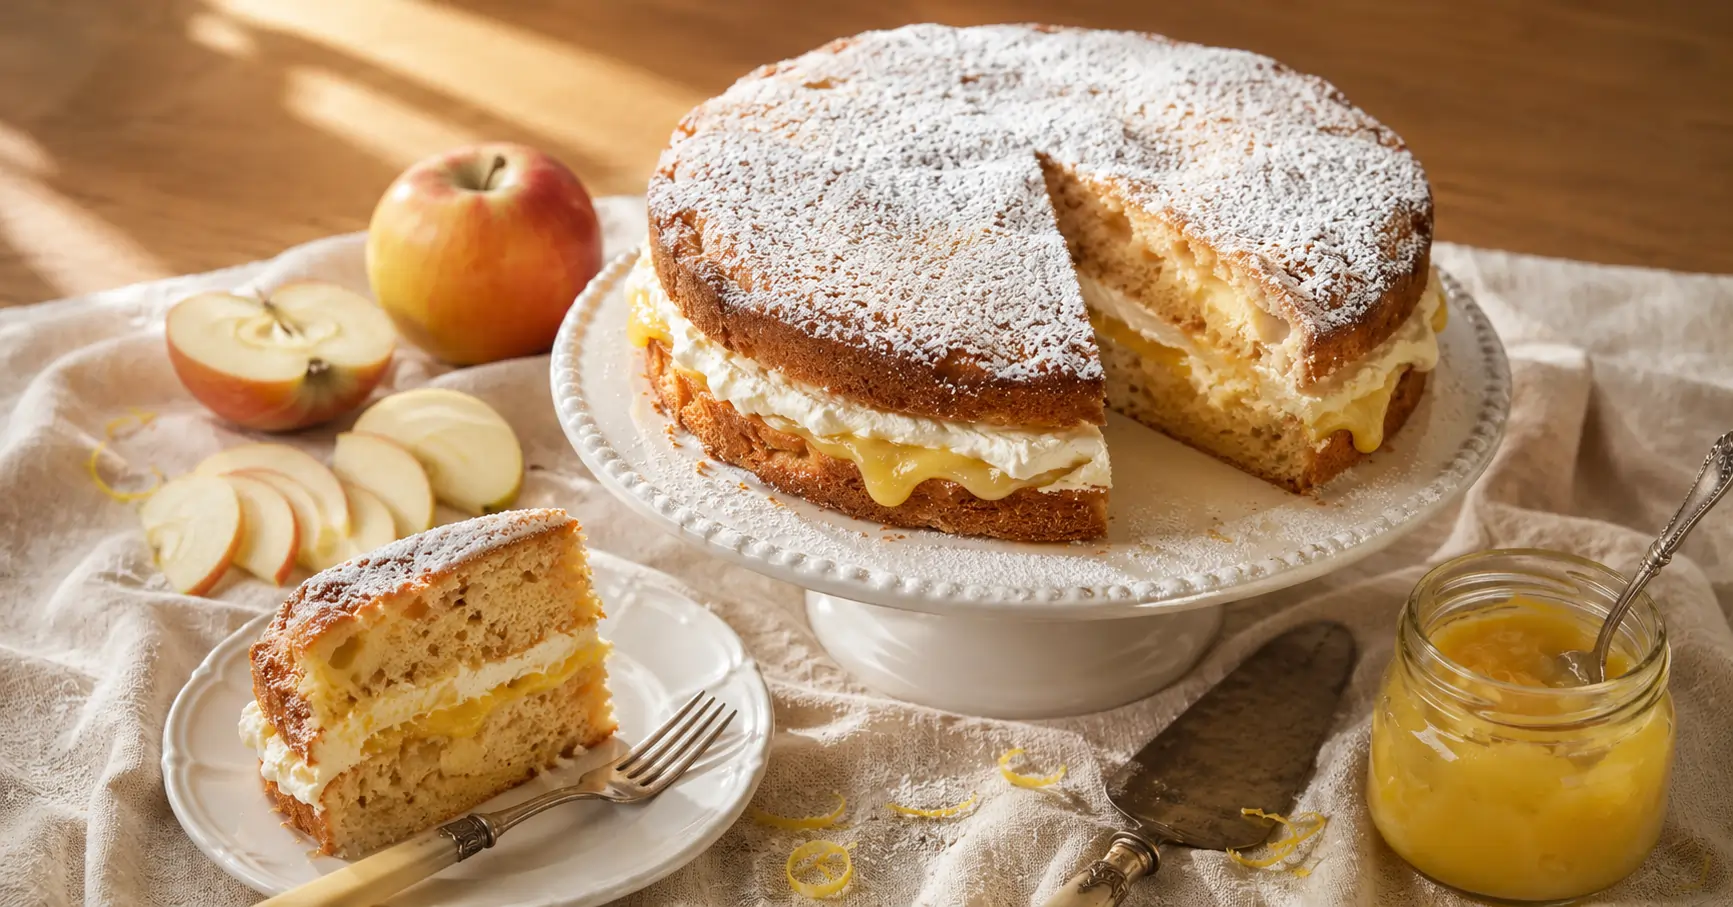
Some recipes just feel like a warm hug, and Mary Berry’s apple and lemon curd cake is absolutely one of them. It combines the gentle sweetness of soft-cooked apple with the sharp, tangy punch of lemon curd in a moist, tender sponge that somehow manages to taste both comforting and a little bit fancy. I baked this on a grey autumn afternoon, and it completely transformed the whole day.
What Is Mary Berry’s Apple and Lemon Curd Cake?
Mary Berry’s apple and lemon curd cake is a beautifully moist layered sponge that weaves together grated or chopped apple through the batter and uses lemon curd as both a filling and a flavour enhancer. The apple keeps the crumb incredibly soft and tender, far more so than a standard sponge, while the lemon curd cuts through the sweetness with a welcome citrus sharpness. It’s the kind of cake that gets better the longer it sits, which is a rare and wonderful quality.
Ingredients You’ll Need
For the Cake
- 225g (8oz) softened unsalted butter
- 225g (8oz) caster sugar
- 4 large eggs
- 225g (8oz) self-raising flour
- 1 tsp baking powder
- 2 tbsp milk
- 1 tsp vanilla extract
- 2 medium eating apples, peeled, cored, and coarsely grated (about 200g prepared weight)
- Zest of 1 lemon
For the Filling and Topping
- 4 tbsp good-quality lemon curd (shop-bought works perfectly, no judgment here)
- 200ml double cream, whipped to soft peaks
- Icing sugar, for dusting
FYI, use eating apples rather than cooking apples. Bramley apples break down completely during baking and can make the batter watery. A Granny Smith or Golden Delicious holds its texture far better and adds a subtle sweetness alongside the lemon.
How to Make Mary Berry’s Apple and Lemon Curd Cake
Step 1: Prep and Preheat
Preheat your oven to 180°C / 160°C fan / Gas 4. Grease and line two 20cm (8-inch) round sandwich tins with baking parchment. Getting both tins properly lined makes the whole baking and turning-out process significantly less stressful and significantly less likely to end in disaster.
Step 2: Make the Batter
Use Mary Berry’s all-in-one method for speed and simplicity. Put the butter, caster sugar, eggs, flour, baking powder, milk, and vanilla extract into a large bowl and beat with an electric hand mixer for about 2 minutes until smooth and well combined. The batter should look pale and creamy with a soft dropping consistency.
Now fold in the grated apple and lemon zest by hand using a spatula. The apple releases a little moisture as it bakes, which is exactly what gives this cake its famously tender crumb, so don’t be tempted to squeeze the grated apple dry beforehand.
Step 3: Bake
Divide the batter evenly between the two prepared tins and smooth the tops with a palette knife or the back of a spoon. Bake for 25–30 minutes until the sponges are golden, risen, and spring back when you press the centre gently.
A skewer inserted into the middle should come out completely clean. If it comes out with wet batter still attached, give it another 5 minutes and check again. Don’t open the oven before the 20-minute mark; thermal shock is the enemy of a well-risen sponge.
Leave the sponges to cool in their tins for 10 minutes, then turn out onto a wire rack and leave to cool completely.
Step 4: Make the Lemon Curd Cream Filling
Whip the double cream to soft peaks. It should hold its shape but still look billowy and light, not stiff and grainy. Gently fold 2 tablespoons of lemon curd through the whipped cream, creating a rippled, tangy cream filling. IMO, this lemon curd cream is the best part of the whole cake. I’d honestly eat it by the spoon.
Step 5: Assemble the Cake
Place one sponge layer on your serving plate or cake stand. Spread the remaining 2 tablespoons of lemon curd directly onto the sponge. Don’t be shy, spread it right to the edges. Spoon the lemon curd cream on top of that and spread gently. Place the second sponge on top and press down lightly so everything holds together.
Dust generously with icing sugar just before serving. That simple finish is classic Mary Berry: clean, elegant, no unnecessary fussing.
Tips for the Best Result
- Grate the apple coarsely, not finely. Fine grating makes it almost disappear into the batter; coarser grating keeps a subtle texture in the finished crumb.
- Use good lemon curd. This recipe only uses 4 tablespoons total, so quality really does show. Tiptree or a good homemade curd make a noticeable difference over a very budget option.
- Don’t overwhip the cream. Soft peaks are what you want for the filling. Overwhipped cream turns grainy and heavy, which works against the lightness of the sponge.
- Serve the same day once assembled, as the cream filling softens the sponge over time. Store any leftovers in the fridge and eat within 24 hours.
Frequently Asked Questions
Can I make the sponge layers ahead of time? Yes, bake the sponges up to a day ahead and store them wrapped in clingfilm at room temperature. Fill and assemble on the day you plan to serve.
Can I freeze this cake? Freeze the unfilled sponge layers only, well wrapped, for up to 3 months. Don’t freeze the assembled cak the cream filling doesn’t survive the freezer well at all.
What if I can’t find lemon curd? You can substitute with a good-quality lime curd for a slightly different but equally delicious result. Orange curd also works and gives the cake a warmer, more autumnal flavour.
Final Thoughts
Mary Berry’s apple and lemon curd cake is one of those bakes that feels genuinely special without demanding anything particularly difficult from you. The apple keeps everything moist, the lemon curd brings the brightness, and that rippled cream filling ties it all together beautifully.
Bake it once, and you’ll understand why it’s become a firm favourite for so many home bakers. Just make sure you cut yourself a decent slice before it disappears because it will.
Mary Berry Apple and Lemon Curd Cake Recipe
Course: Desserts4
servings30
minutes40
minutes300
kcalIngredients
For the Cake
225g (8oz) softened unsalted butter
225g (8oz) caster sugar
4 large eggs
225g (8oz) self-raising flour
1 tsp baking powder
2 tbsp milk
1 tsp vanilla extract
2 medium eating apples, peeled, cored, and coarsely grated (about 200g prepared weight)
Zest of 1 lemon
For the Filling and Topping
4 tbsp good-quality lemon curd (shop-bought works perfectly, no judgment here)
200ml double cream, whipped to soft peaks
Icing sugar, for dusting
Directions
- Prep and Preheat
Preheat your oven to 180°C / 160°C fan / Gas 4. Grease and line two 20cm (8-inch) round sandwich tins with baking parchment. Getting both tins properly lined makes the whole baking and turning-out process significantly less stressful and significantly less likely to end in disaster. - Make the Batter
Use Mary Berry’s all-in-one method for speed and simplicity. Put the butter, caster sugar, eggs, flour, baking powder, milk, and vanilla extract into a large bowl and beat with an electric hand mixer for about 2 minutes until smooth and well combined. The batter should look pale and creamy with a soft dropping consistency.
Now fold in the grated apple and lemon zest by hand using a spatula. The apple releases a little moisture as it bakes, which is exactly what gives this cake its famously tender crumb, so don’t be tempted to squeeze the grated apple dry beforehand. - Bake
Divide the batter evenly between the two prepared tins and smooth the tops with a palette knife or the back of a spoon. Bake for 25–30 minutes until the sponges are golden, risen, and spring back when you press the centre gently.
A skewer inserted into the middle should come out completely clean. If it comes out with wet batter still attached, give it another 5 minutes and check again. Don’t open the oven before the 20-minute mark; thermal shock is the enemy of a well-risen sponge.
Leave the sponges to cool in their tins for 10 minutes, then turn out onto a wire rack and leave to cool completely. - Make the Lemon Curd Cream Filling
Whip the double cream to soft peaks. It should hold its shape but still look billowy and light, not stiff and grainy. Gently fold 2 tablespoons of lemon curd through the whipped cream, creating a rippled, tangy cream filling. IMO, this lemon curd cream is the best part of the whole cake. I’d honestly eat it by the spoon. - Assemble the Cake
Place one sponge layer on your serving plate or cake stand. Spread the remaining 2 tablespoons of lemon curd directly onto the sponge. Don’t be shy, spread it right to the edges. Spoon the lemon curd cream on top of that and spread gently. Place the second sponge on top and press down lightly so everything holds together.
Dust generously with icing sugar just before serving. That simple finish is classic Mary Berry: clean, elegant, no unnecessary fussing.